Share this
Tech. It’s something I love to talk about and, based on the number of posts in XYPN’s member forums, XYPN members do too. I’m always looking for new apps, quick tips, or hacks that can save me time and make my life a little easier.
Like I wrote previously, time management is one of the biggest problems and stresses advisors face in the Network. When you are your own CEO, CCO, CMO (the list goes on) and wearing multiple hats daily, technology has the power to free up some of the time you’re always chasing.
The downside of investing in a new technology, however, is that there is usually a cost. That’s one of the many benefits of joining the Network—the core technology ($540+/mo value) that you use is included in your membership cost.
But, as the saying goes, there’s no such thing as a free lunch. Maybe so, but what about some free technology that will make your practice a little more efficient and your life a little easier?
I’ve selected four different apps to consider incorporating into your financial planning practice. One is geared toward client communication, and the other three are mainly focused around improving productivity. While none of them are specific to the financial planning industry, all can play a role in making your life better, and the best part is they’re all are free.
#1. CloudApp
Picture this. You just landed a new client, and you need them to link their bank accounts in eMoney. Seems simple to you, but to them, not so much. Maybe they’re a little technology challenged, and they just can’t figure it out. So you get an email. And then another. You keep emailing back and forth to try to solve the problem, but you can’t really convey what they need to do in words.
You obviously don’t want to make them feel stupid—you just want to show them the steps they need to take. You’d like to screenshare, but you’re not in a meeting. They want to do this now and you feel powerless to help them.
Enter CloudApp.
CloudApp is a technology that enables you to easily create images, videos, and gifs to share information.
Pricing
There are four pricing options: Free and Pro ($9/mo) for individual users, and Team ($8/user/mo) and Business ($17/user/mo).
If you end up using CloudApp for some time and find you need additional features like unlimited video recordings or enhanced editing, it would maybe make sense to upgrade to Pro. However, for the needs of most advisors (at least in the Network), I can’t imagine needing anything that the free version doesn’t offer. And did I mention, it’s FREE?
Getting Started
First, you’ll need to create a profile with CloudApp. Simply enter your email and create a password and click continue. You’ll be prompted to name your team; you can skip this step unless you plan on using this tech with your partner or other employees. Next, just choose your OS (Mac or Windows) and it will begin downloading and boom, you’re done. Easy as pie.
The app will show up in your computer’s toolbar. Now you’re ready to go.

Making a GIF or Screen Recording
If you’re trying to show your client how to do something on a computer screen, creating a GIF or a screen recording is a perfect way to do it. If it’s something you can do quickly (under 15 seconds), a GIF is the best option. If you’d rather create a longer video to help walk your client through a more complicated setup of an online profile or integration, a screen recording (with your mic on if you’d like to provide some commentary) may be your best bet.
To begin, just select either the GIF or the video option in the square below. You’ll then get to choose your screen recording size. You can select your whole screen, or just the part that you need to show to communicate your message. (Don’t worry, you can hide the 20+ open tabs on your browser or your cluttered homepage.)
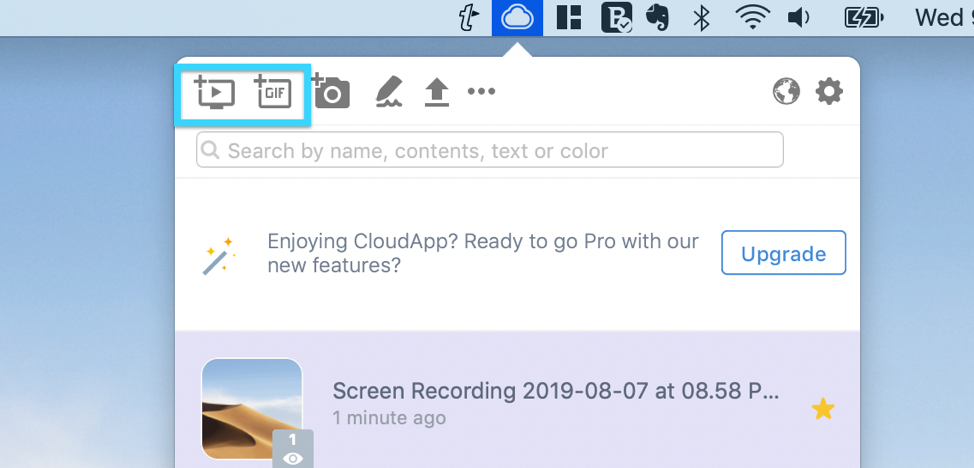
When your recording or GIF is done, just select the three dots and choose “Download File”. Your recording or GIF can now be easily uploaded from your “Downloads” file wherever you need it, whether into an email, a document, or even a text.

Editing a Screenshot
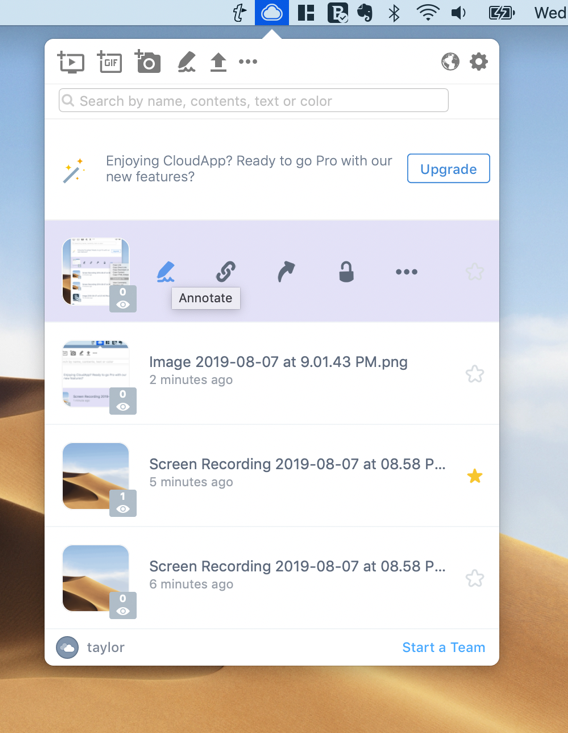
Alternatively, let’s say you’re creating a new client guide and want to include instructions on where to click on your homepage to access certain documents. Through CloudApp’s editing tools, you can easily create images to communicate to clients or prospects exactly what they need to know without any back and forth.
This time, click the cloud icon in your toolbar and then select the camera instead of the GIF or recording buttons. Take a screenshot of your homepage, again, either of your whole screen or a small portion. When you’re finished, the screenshot will be ready for editing in CloudApp. Just click on the cloud icon, and then the pencil “Annotate” button next to the picture you’d like to edit.
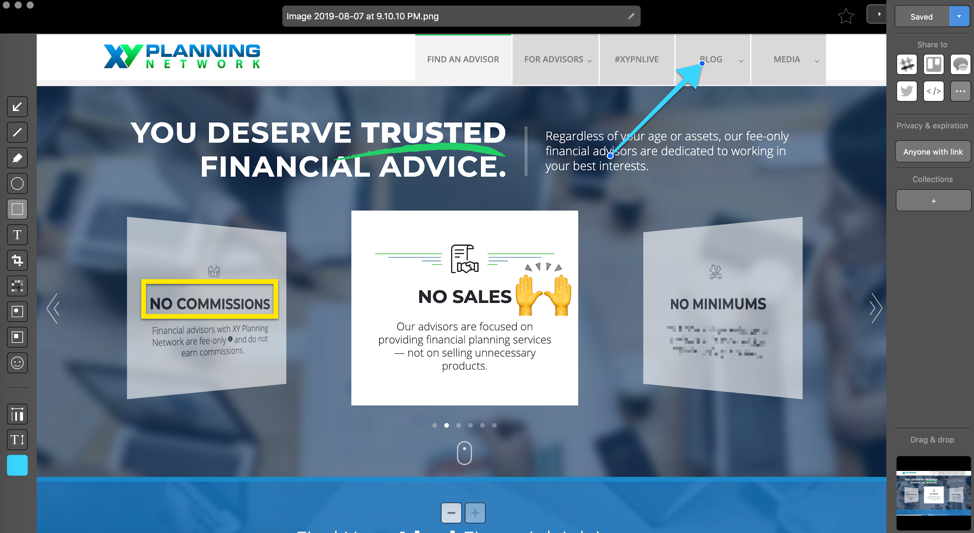
From the annotation page in the app, you’re given a plethora of options. Draw an arrow to an important item or a box to focus someone’s attention. Insert text if need be. You can blur text if you’re protecting sensitive information. You can even insert emojis. All of the text, arrows, and lines color and size customizable.
Play around and have a little fun while you learn what features make sense for you and your firm. Hopefully CloudApp can save you some headaches and make both your life and your clients’ lives a little easier.
#2. Flycut
We’ve all been there. You’re working on something—maybe a website update or a blog post—and you’re editing to make it just right. You keep copying and pasting, copying and pasting, from webpage to blog and back. All of a sudden, however, what you try to paste isn’t right. You frantically hit undo, but you can’t find what you’re looking for. It was from a webpage but you’re not sure which, or where it went. With a sinking feeling, you realize you copied twice in a row without pasting. In other words, your much-needed phrase is now gone, forever disappeared into the ether.
No more. If you’re a Mac user, you can download Flycut today. (If you’re a Windows user, you can find some Flycut alternatives here).
What is Flycut
Flycut is a clipboard manager. It’s a popular tool mainly used by developers. (In fact, I learned about this app from a developer on our team at XYPN.) But non-developers can make good use of this tech too. I’ve found it to be immensely useful without developing or coding a single thing. Essentially, it keeps a catalog of everything you copy on your computer and allows you to easily access and paste it again.
This can be a huge timesaver when working with a lot of text across multiple windows and browsers, so if you do happen to copy twice, Flycut has your back. Until you start using it, you won’t realize how useful it is to have a backlog of all of your copied items.
Oh, and did I mention it’s completely free to download and use?
Getting Started
You can download Flycut directly to your Mac here. Once downloaded, it will add to your computer’s toolbar just like CloudApp with a red locker logo.
How to use Flycut
Copy some line of text, a whole paragraph, or a link, and then click on the Flycut locker icon. It will show you a dropdown library set to a default of 10 of the most recent words, sentences, or links you copied. You’ll be able to view the first five words or so of whatever you copied, so you can click whichever phrase or link you’d like to paste directly from there.
There’s no limit on the amount of text copied and saved, so don’t fret about copying large blocks of text. It will all be there later.
Yep, it really is that easy. No need to spend hours learning this new technology; you can download Flycut and start using (and benefiting from) it immediately.
#3 & #4. Google Tasks and Google Keep
You’re in Gmail, making quick work of zeroing out your inbox. But your next email is a reminder from your dentist to reschedule your appointment—shoot. You really need to do that. You scramble for a pen to jot it down on your to-do list, but you can’t find one, so you move on. You’ll remember later, right?
A minute later, you get to an email with a client suggestion. It’s really a great idea, so you throw it on a sticky note, or in your computer’s notes app, which, as you know, by the end of the day will either be gone or irretrievable. When you need it a week later, you’ll spend hopefully just minutes trying to remember what day you wrote it, or where that sticky note ended up.
Sound familiar at all? When I’m completing a certain activity, I need to do everything I can to stay in the zone. If I’m working on emails and even just have to open a different tab and break my focus, it’s much harder to achieve the level of productivity I just had.
That’s where Google Tasks and Google Keep come in.
Google Keep is Google’s notetaking technology; Google Tasks is their to-do list technology. If you’re a user of any Google apps, including Drive or Gmail, these tools are ready to use. You may have seen them on the right side of your Gmail inbox on the toolbar but have never really been sure what they are—and you certainly haven’t had the time to figure out how to use them or if they’re even worth using.
I know, I know, more productivity apps. However, a huge reason I’ve started using both of these apps is that they’re always on the right sidebar in ALL of my Google apps. You can add a quick task or note in the middle of writing a blog in Google Docs or answering an email in Gmail without even leaving the current webpage you’re on. Additionally, you can download each as a separate app to use across all of your devices, Android or iPhone.
Google Tasks Pro Tip
Have a to-do that involves information in an email? You can drag and drop any email from your Gmail into your task sidebar. A task will be created with a link at the bottom back to the email you dragged. Anytime you need to refer back to that email for context, you can just click that link and your email will pop right up.
Google Keep Pro Tip
Download the Google Keep Chrome extension. Once installed, you can click the Google Keep icon on any webpage and jot down a quick note or thought. When referring back to your notes, there will be your note along with a link to the webpage you were on when you made it, which is a great way to track where your notes came from and what may have prompted them.
As the Steve Miller Band tells us, “Time keeps on slippin’, slippin’, slippin’, into the future”. No matter how impeccable your planner is, how early you wake up, or how much coffee you drink, we all wish we had a little more time in the day. Although testing out and incorporating new technology may sit at the bottom of your want-to-do list, solutions like these can help regain some of that lost time, giving you more time to give back to your clients and yourself.

About the Author
As a Member Experience Specialist at XYPN, Taylor Deardorff enables our members to take advantage of XYPN's ever-growing range of benefits. Through consistent communication with our growing Network, Taylor has become intimately familiar with the needs and challenges our advisors face servicing their clients and growing their RIAs. She loves XYPN's members and sharing the XYPN message.
Share this
Subscribe by email

3 Tech Solutions Every Independent Financial Advisor Should Be Using

10 Lessons You'll Learn in the First Year of Running Your RIA